|
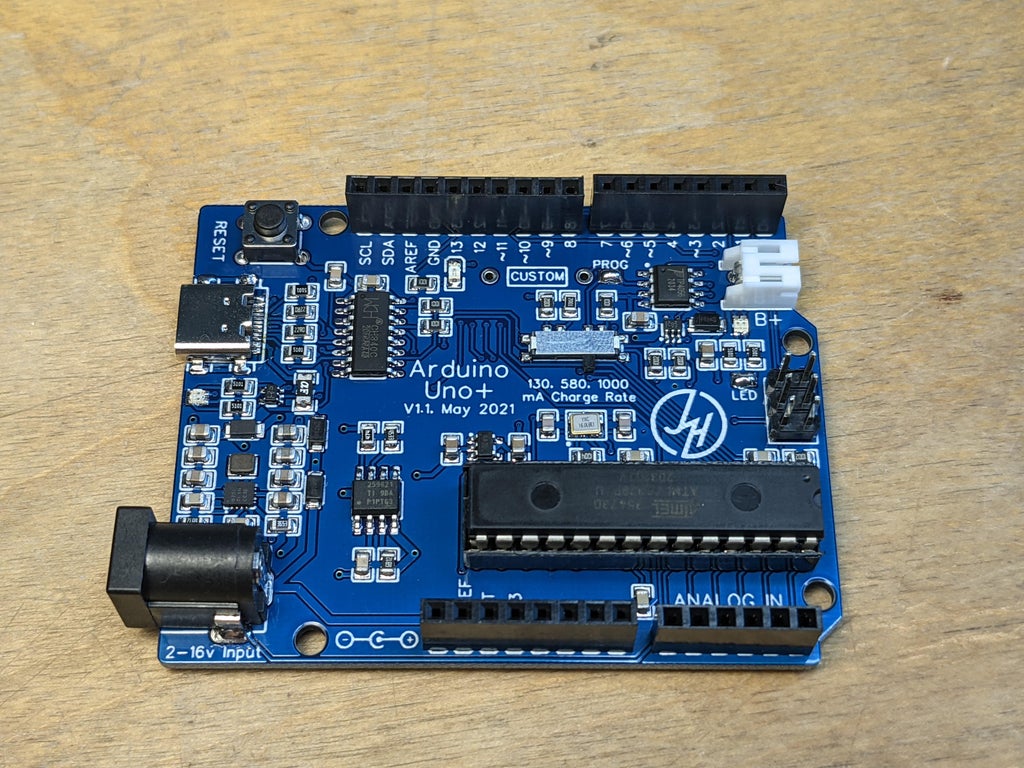
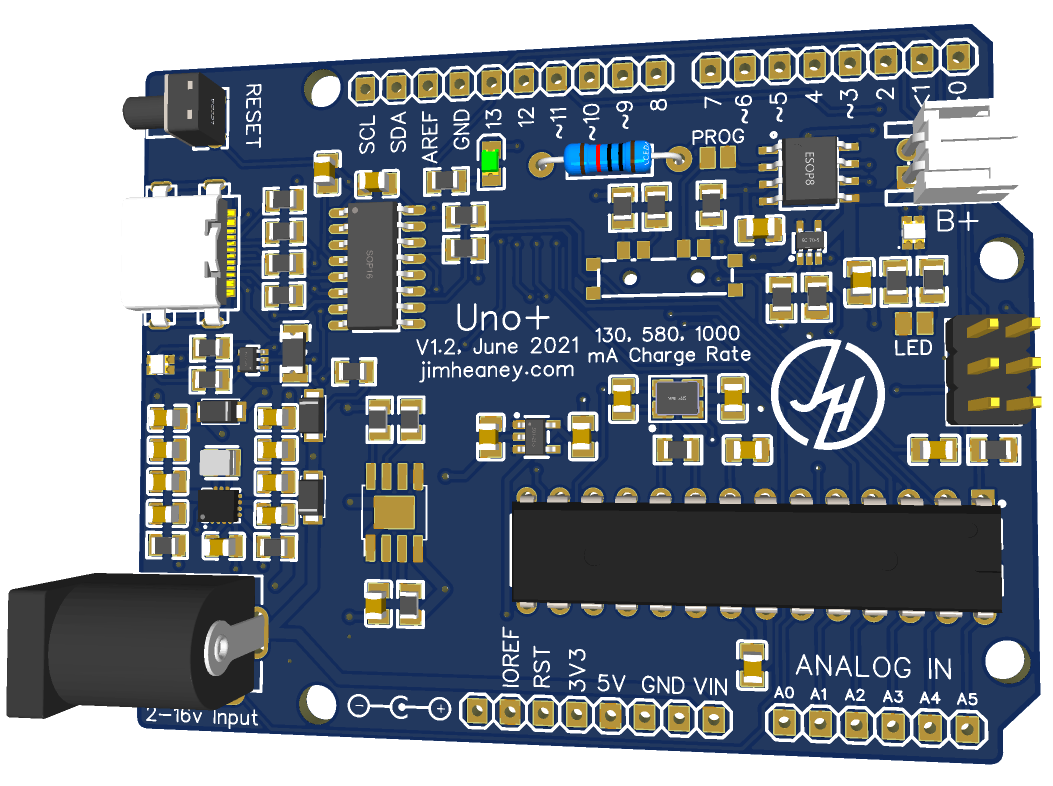
SummaryThe Arduino Uno is probably one of the most iconic microcontroller boards for makers. Over the last 10 years, hundreds of thousands of these blue boards have been the heart of millions of projects. I myself have had a few dozen projects with the Uno at the core. However, I felt that there were some issues with the Arduino Uno, so I decided to make my own version; the Uno +.
The Uno Plus keeps the same form factor and pinout as a traditional Arduino Uno, as well as the same microcontroller (in DIP format too, since that comes in handy a lot and many clones switch it for a QFP). There are a few key differences between the two;
|
- The Uno's USB Type B port was taller than most pin headers, so as a result any shield placed on top of the Uno would hit the shielding of the USB port. I decided to swap the USB-B port for a more modern USB-C port, that also supports a higher input current for running projects.
- On the note of input current, I replaced the standard LDO with a Texas Instrument Buck/Boost, that allows the Arduino to run on any power source from 2 to 16 volts (although between 3 and 12 are more efficient), and provide a continuous 2 amps on the 5 volt rail, so there is no need for additional power circuits in a project.
- While upgrading the power systems, I also swapped the comparator that was generating the 3.3v rail for a real voltage regulator. You can now draw up to 600mA on the 3.3v rail.
- I also added a Texas Instrument Electronic Fuse, that will prevent overcurrent, undervoltage, overvoltage, and short-circuits. In addition to the polyfuse on the USB input, this will hopefully prevent any damage to the Uno Plus or anything it is connected to.
- The board can be powered over USB or the barrel jack like a normal Uno, but also has a JST PH connector on one side for a 1S LiPo battery. The Uno + will prioritize its power sources (draw from barrel jack, if not then draw from USB, if not draw from battery), and the change-over is so quick many small projects will not even notice if you were to unplug it and swap over to battery.
- To keep the battery topped up, there is a TP4056 charging circuit built right into the Uno +. You can select from one of three preset charging currents with a switch, or desolder a jumper and add your own Axial resistor to set a charge current. The battery will be automatically charged when the barrel jack or USB are plugged in, and the charger will disconnect when the battery is the only power source.
- And best of all, despite all the extra features, it is still cheaper than a genuine Arduino!
See more on my GitHub! Link Here.